

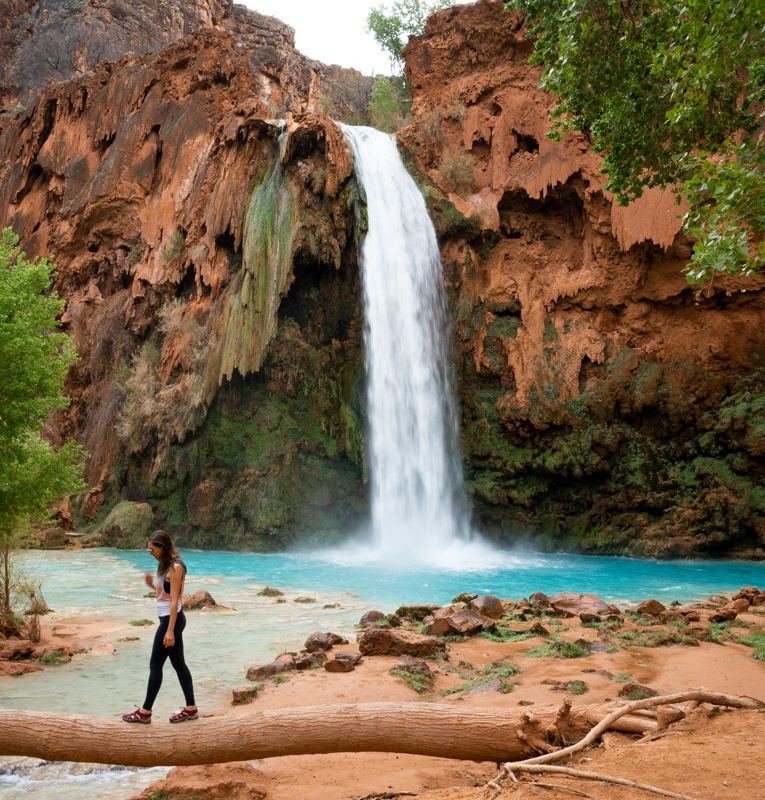
Ever wonder why the water of the Havasupai Falls is so blue? Thanks to minerals like calcium carbonate and magnesium in the water, as well as the Havasu Creek that washes away the silt, the water remains a baby blue color against the orange canyon year-round, providing a spectacular sight to hikers willing to go the 10 miles in (and back out).
The following is a comprehensive guide to help you prepare for the hike to the falls in Havasupai, as well as get through the permitting process, find all the best photo ops, and pack the lightest possible pack for the expedition. Ready to dive in? Here are 14 things to know about hiking to Havasu Falls (plus a few things I learned the hard way, so you don’t have to!):
1. Havasu Falls is located on the Havasupai Reservation
Pai means people, and Havasu Pai means “people of the blue-green water”. The water in Havasupai is said to flow over the land and through every member of the tribe, which I thought was such a beautiful saying.
The tribe has lived in the Grand Canyon for more than 800 years. According to Grand Canyon’s site, “By 1919 with the establishment of the Grand Canyon National Park, the Tribe was restricted to 518 acres, 5 miles wide and 12 miles long in a side canyon. The Tribe has since had returned to them 188,077 acres of their former homelands which makes up their reservation today”. Today, the 600 tribe members still live in their original homeland and sustain their life by farming and working on tourism-related jobs. Since the falls are located on a reservation, and due to the large volume of those interested in going, permits are required, which brings me to the next section:
2. You’ll need a permit
The only option to visit the falls is to book a 4D3N permit. They do not allow day hikes or anything shorter or longer. Permits for Havasupai sell out immediately, and can only be booked online.
Make sure to create an account on the Havasupai Reservations website PRIOR TO February 1st. Be on the site before 8am Arizona time on February 1, and click when the button illuminates for permit sales.
If you don’t have a permit already reserved, do not despair! The website lists “canceled/transferred” permits up for grab everyday at 8AM MST. It’s definitely worth trying your luck as it looks like there are plenty available. You will need to create an account on the site for this.
I signed on right at 8am and it took about 2 hours to get mine in 2019. The page crashed several times, forcing me to refresh it about 20 times before I got through. By then few dates were left so I took what I could get and ended up with late March.
3. Pick the right season
Permits for Havasu Falls are available from February through November, and peak season is from May-September, whereas the monsoon season is from July-August. If you are visiting during this time, evacuation is possible. Here are some things to consider:
- February – April: Temperatures tend to be cooler and it might be too brisk to want to go swimming. Hiking will be much easier during these cooler months since most of the hike in (and out) is totally exposed to the sun.
- May – June: Slightly warmer weather, however it can be buggier too. Average temps for June run 96F/36C.
- July – August: Expect the hottest temperatures that Havasupai experiences, at an average of 99F/37C. This is also the monsoon season, but curiously the most popular time for permits. I can’t imagine backpacking in this weather so that was never an option for me. If there is a flash flood like in 2018, it’s possible permits will be canceled without rebooking or refunds offered.
- September – November: Temperatures can still be quite hot in September, but going into October and especially November, expect colder temperatures and the possibility that it’ll be too cold to swim depending on the year.
In conclusion, the best times to go are April, May, and October if you want the best of both worlds – more moderate heat that might still inspire you to swim.
Also keep in mind that rain doesn’t necessarily mean the canyon will close. It rained on me during my hike in and then the clouds passed and all was well. Flash floods are more likely in the summer months when things are drier all around and the ground is less able to absorb stormwater.
4. What to expect from the hike
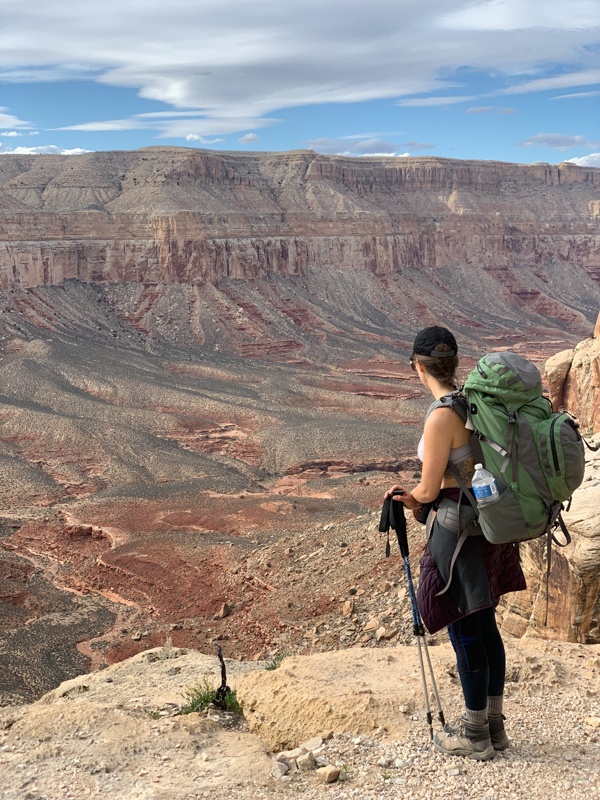
The hike to Havasu Falls from the trailhead is 10 miles. It’s an easy-to-navigate trail that meanders through a lovely orange canyon as you make your way the 8 miles to the town of Supai to check in and another 2 miles from there to the campground and Havasu Falls itself.
I was surprised when I saw the hike rated as ‘difficult’ on my AllTrails app. Since it’s mostly flat I thought reviewers were being dramatic. The hike down, assuming you’re not doing it in 100-degree heat, is pretty easy. It goes down switchbacks (but nothing like what you’d encounter in Zion, if you’re familiar) at first and continues at an ever so slight decline until you reach the town of Supai. From there it turns a bit steeper again until you reach Supai Falls and the first campground.
The hike out felt more difficult to me. I realized that the slight incline would become harder on the terrain, which is mostly sand and rocks. I got a blister for the first time ever in my hiking shoes from all of the rocks and foot movement, and I failed to time it right. If you hike in midday, you’ll be in the sun. Since it’s a 10-mile hike, it’s hard to avoid getting midday sun at some point, which is why I can’t see myself ever attempting this in the summer months.
The final switchbacks to get out aren’t all that bad. If you’re not used to hiking or backpacking, it might feel brutal but if you hike regularly, you’ll be just fine.
Here are a few important things to know:
- Begin your hike as early as possible to avoid the heat (or if you can’t get there early to hike in, aim for the afternoon while giving yourself enough time to get there before dark).
- The hike in usually takes 4-7 hours and the hike out takes 5-8 hours. It took me 4 in and 5 out with a few breaks and a steady pace.
- There’s almost no shade, so time your hike to have the shadows of the canyon walls and bring sunscreen and a hat.
- Hiking poles are helpful to stabilize on the rocks and the switchbacks.
- There’s little to no water on the trail, so carry your own in. I’d bring a minimum of 2 liters down and 3 up, per person, in the hotter months and only slightly less if it’s a shoulder season.
5. There are options if you’d rather not carry your gear
If you’d rather not carry all of your own gear, you can book a mule to carry most of your camping equipment and food down for you. They cost $400 round-trip per mule and can carry up to 4 bags, 32 lbs (14.5 kg) per bag. You can reserve them when you book your permits by logging into the same site.
However if you’re an animal lover, I urge you to pack light and carry your own gear. I’ve heard through the grapevine that these animals don’t have the best lives and how could they, traveling back and forth over rocks in such extreme heat? For this reason I carried my own pack. In the next section I’ll help you to lighten your load and make it easier to backpack in.
Finally, there’s a helicopter option as well. You probably didn’t end up on this page because you’re interested in flying in or out, but in case you are, you can fly for $85 per person one way, on a first-come, first-served basis. Though their website doesn’t say, I assume you’ll have to use a pack mule for your gear if you use this option. Find out more here.
6. What to pack and how to prep
Here’s my ultimate backpacking checklist with all of my tried and true gear.
There are also a few things that are special to Havasu Falls to keep in mind:
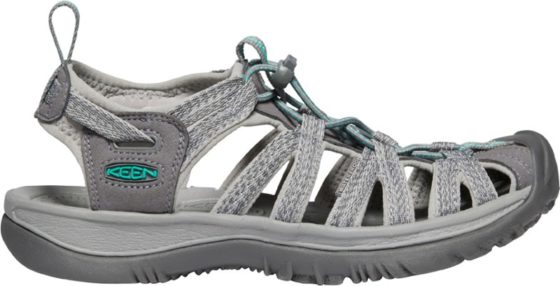
- You’ll want a second set of amphibious shoes. There are several waterfall crossings if you want to see Beaver Falls, and taking hiking boots off and putting them back on over and over is such a drag. It’s best if these cover your toes, have tread, and are lightweight. I love this pair:
- There were at least 50 partially used gas cans left behind on the rangers’ table – used as a kind of leave behind and take as needed area, which you’ll see when you enter the campground. I suppose it’s risky to count on being able to get fuel down there, but I certainly could have done that!
- You have to pack out all of your trash, so keep that in mind when selecting which food to bring.
- Bring a bathing suit and microfiber towel.
7. The food situation
For the most part, you’re going to need to bring your own food into the campsite and should plan for three days. That said, there are a few food options along the way (maybe).
Your first option will be at a small café at the beginning of Supai 8 miles in. The faded sign reads, ‘world-famous’, so you know it’s got to be good, right? They serve burgers, sandwiches, and other junk food. You should also be able to stock up on things like Gatorade, though I wouldn’t count on it being open all the time.
As you walk further in, you will see several stands that may or may not be staffed serving up nachos, fry bread, and Indian tacos, which are ground meat served with fry bread. I’m pretty sure ‘fry bread’ is exactly what it sounds like although I’ve never had the pleasure of trying it.
Again availability of snacks is hit or miss. There’s a funny sign when you walk by one of the stands that says they open at 9:30, are sometimes there at 10:30, and might be serving by 12:30. So, don’t count on it being available, but it’s a nice surprise if it is!
8. Where to camp
The campsite begins at the base of Havasu Falls and runs all the way to the top of Mooney Falls. You can camp anywhere, though there are some things to keep in mind:
- You have the option of crossing a bridge to camp on an island or you can camp near one of the canyon walls.
- Campsites are all first come, first served.
- There are three bathroom areas: the entrance, in the middle, and the end. I camped in the middle but it seems to me that the bathrooms at the entrance get serviced more often. They were cleaner and more likely to have toilet paper.
- The bathrooms are just drop toilets, so don’t expect showers or running water of any kind. Please practice leave no trace principles, which means actually using the bathroom and spreading out your gray water from the toothbrushing or cooking as far from the water source as you can, which is hard to do down there, I know.
- There are no trash cans so you’ll need to check out your trash. Keep in mind that anything you leave down there most likely has to be carried out by a mule, a poor little mule.
- There’s no huge advantage to camping in the beginning, middle, or end except for proximity to the falls. If you are at the end you’ll be closer to Mooney or at the beginning, closer to Havasu and the natural water spring.
9. How to keep your food safe
The squirrels and I did not mutually agree that human food is for humans, despite my best efforts. I found out the hard way that hanging your food, even if it’s far away from the tree and strung between two trunks, is NOT enough at Havasupai.
I was initially camping near the canyon wall and later realized it must have been right near where they’re living. It didn’t take them long to ravage what I had, leaving me with meager rations. I moved my tent to an island instead and found some buckets that had been left behind by other campers. There were also some buckets with a lid, like Home Depot sells, at the front of the entire camp as well. Use one of these or consider bringing your own to be extra safe. Either hang or place rocks on these and you should be good, since squirrels thankfully can’t chew through the plastic. Alternatively, take one of these with you. I wish I’d known how clever and resourceful those guys would be!
10. Additional hikes: Beaver Falls, Mooney Falls, and the hike to the Colorado River
There’s more to Havasupai than Havasu Falls! Save some energy and throw your waterproof shoes on because both Beaver Falls and Mooney Falls are worth checking out on day 2 or 3, and you can even go all the way to the Colorado River if you are feeling up to the challenge.
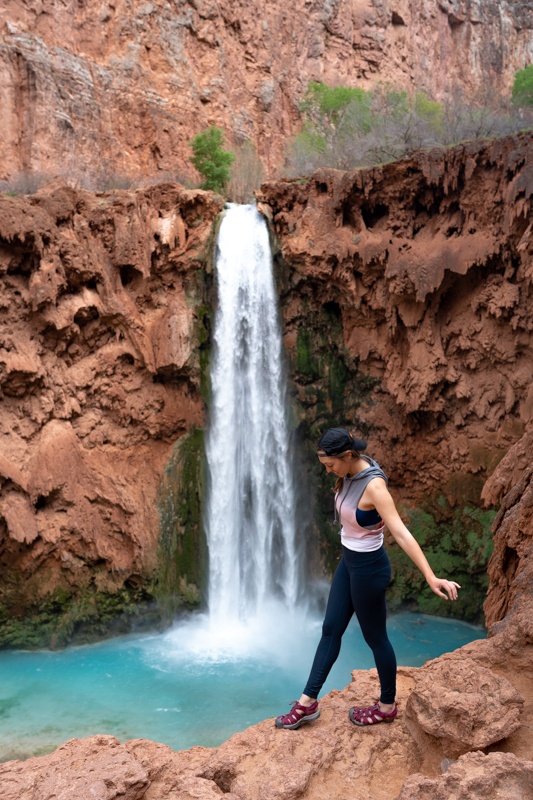
Mooney Falls: You can easily reach the top of Mooney Falls by walking to the end of the campsite. You’ll notice on the Havasupai website that they do not recommend going beyond the campsite and you’ll see a bunch of signs warning you about the dangers as well.
Truth be told this is an incredibly sketchy waterfall to get to the bottom of. The stairs become slick and incredibly steep and you’ll be getting misted with water while you try to make your way down the chain links. I have a pretty high tolerance for such things and I thought it was sketchy AF. Still, I’d do it again.
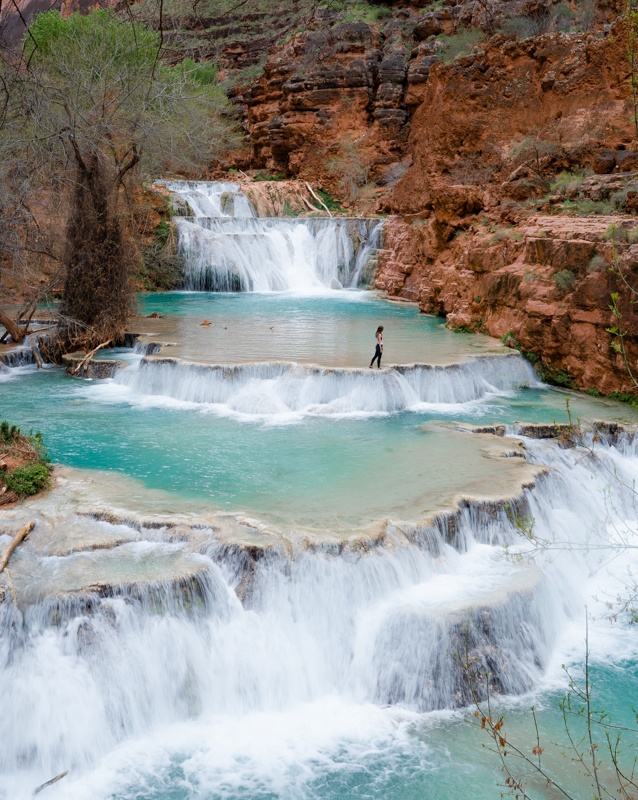
Beaver Falls: The first photo in the section is of Beaver Falls’ tiered pools. This was the part of the trip that I was most excited about and it did not disappoint! To get to these, it’s another 4 miles or so down a trail from Mooney that isn’t always clear. Once you get to the bottom of the chain links and ladders at Mooney, you’ll notice a path directly to your left. Follow that and always have a look out for the clearest most obvious path. You’ll have to cross the river several times and this is why the amphibious shoes are so important. If it’s warm enough it’s best to wear quick dry shorts as well, and a bathing suit so that you can swim. I’d also suggest a dry bag like this one for your camera just in case:

Colorado River: If you leave super early in the morning, you can see a side of Havasupai that few see, and hike all the way to the confluence with the Colorado River. You’ll be walking through water for much of this hike and it will be about 16 miles round trip. If you have the time and energy it looks amazing. Find out more here.
Fifty Foot falls and Navajo Falls: Between Supai and Havasu Falls you’ll see some cascading water to your left. You can walk down and see another set of falls there that are similar to Beaver. Fewer people visit these and though they do have more algae which makes it less blue, they’re still lovely. More here.
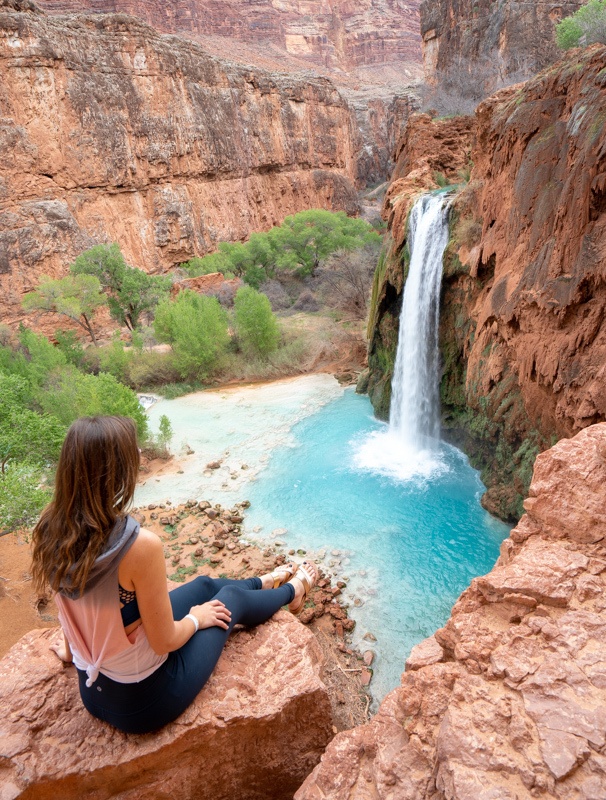
11. Photography tips
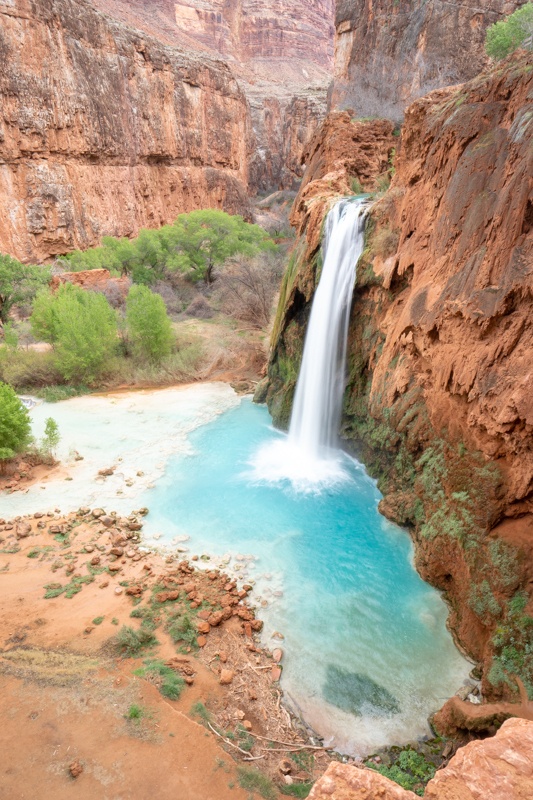
The baby blue color of the falls is spectacular in any light, but I found that it looked the best under diffused light, meaning a light cloud cover. Since I was there in March and it had been raining, most of the weather I got was like this. In the rare moments that the sun was beating down on the falls, they were totally bleached out to my camera, though still beautiful to the naked eye.
Since we can’t control the weather, I’d avoid shooting the falls during midday. Early in the morning or later in the afternoon are both good times to take photos. By the time I made it to Beaver Falls, it was about 4pm which was perfect. Otherwise, you can get awkward shadows.
Just make sure that if you do decide to go to Beaver Falls in the afternoon you have enough time to make it back to camp before dark. Remember, you have that sketchy ladder to climb up at Mooney!
You can learn more about my photography gear here, and more about how I take my own photos here.
12. Drinking water tips
As mentioned earlier in the post, there isn’t going to be drinking water along the trail so make sure that you come prepared. Once you get to the campsite, there is a spring near the beginning where you can fill up.
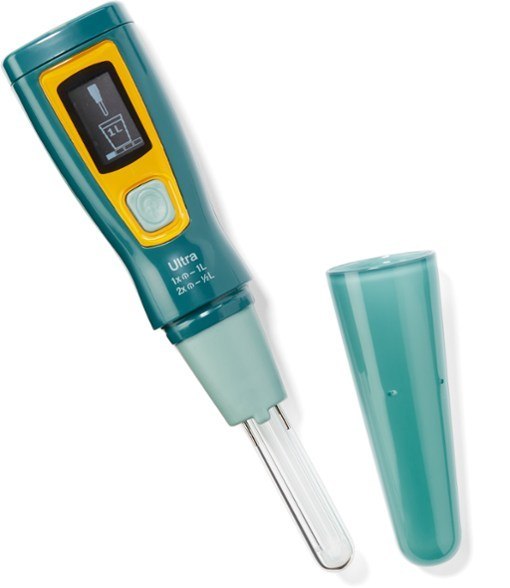
I just used the spring to fill up my water bottles and was perfectly fine. If you’re uncomfortable with this, bring a filter or backup method for cleaning your water. I’m a fan of the steriPEN for the spring water, but you’ll probably want to bring a filter if you plan on taking the water from the river or near the falls due to all the minerals.
The farther you camp from the beginning of the campground, the farther you will be from the clean water source. In this case you may want to bring a filtration method.
13. Getting to the Trailhead
The most geographically proximate airports are Las Vegas, which is three hours away, or Phoenix. I flew into Phoenix then drove to Flagstaff for my overnight and drove in the next day. The journey still took about two hours from Flagstaff.
Keep in mind that most times of the year it’s incredibly hot, so you want to get to the parking lot to start your hike in as early as possible. That said, there are animals on the road and it’s a bad idea to try to drive in while it’s still dark.
There’s no campsite at the parking lot, though if you’re in a camper van or have a truck you could feasibly car camp.
One of the best and closest options for overnighting close to the parking lot and trailhead is the Hualapai Lodge, which I recommend booking immediately after you get your permit since it tends to book out quickly.
Alternatively, head out later in the day and plan on an afternoon hike. This can be risky if it’s during a hot time of year, as it may not have cooled down yet, and you have to be pretty confident of your hiking time. I started my hike around 12:30 in the afternoon and was able to make it in before the permit office closed. Frankly I’m unsure what happens if you arrive after the permit office is already closed for the day. Typically, you would bring your ID to check in and you will be given a wristband. There will also be someone checking in cars before you’re even allowed to park.
14. Getting out
When it’s time to head out, just keep in mind that you will need a bit longer to hike back up and out than you needed to come in. Since it’s a gradual downhill for most of the way in, it’s an ever so slight uphill all the way out.
The earlier you can pack up and head out the better. Alternatively, head out in the afternoon but make sure that you leave yourself enough time to be out before dark.
Admittedly, I didn’t time my exit very well and ended up hiking in the sun. This was OK because it was March and clouds were rolling in and out which provided shade, but I could see how miserable it can get in the summer!
Finally, make sure that you are driving out while there is still some light to deal with the aforementioned animals on the road.
And there you have my ultimate guide to Havasu Falls, and all that you need to know to have a wonderful trip.
Though Havasu Falls takes a considerable amount of effort, and funds these days, seeing that baby blue water for the first time with my own eyes made me realize that no, it’s not Photoshop and yes, it really is that amazing!
Enjoy your time, take lots of photos, leave no trace, and have a blast!

Read Next:
The Ultimate American Southwest Road Trip Itinerary
Upper vs. Lower Antelope Canyon, Which is Better?
*Some of the links in this post are affiliate links. Any purchase you make through these links supports this site at no extra cost to you. Thanks for supporting!
Please visit:
Our Sponsor